
# Exploratory Testing
Exploratory Testing lets you call a phone number from your browser and map what the IVR does, turn by turn. You listen, press keys or speak, and every prompt the IVR plays becomes a node in a graph. You can then correct and annotate that map, choose a route for the next call to follow, and turn the result into a Bespoken test suite.
It is a quick way to learn an IVR you don't know yet, or to document one before writing functional tests for it.
Note
Exploratory Testing currently supports phone (IVR) numbers only.
# Accessing Exploratory Testing
Click Exploratory Testing under the Testing group in the sidebar. You'll land on the Exploratory Tests page, which lists every exploratory test in your organization.
# The Exploratory Tests Page
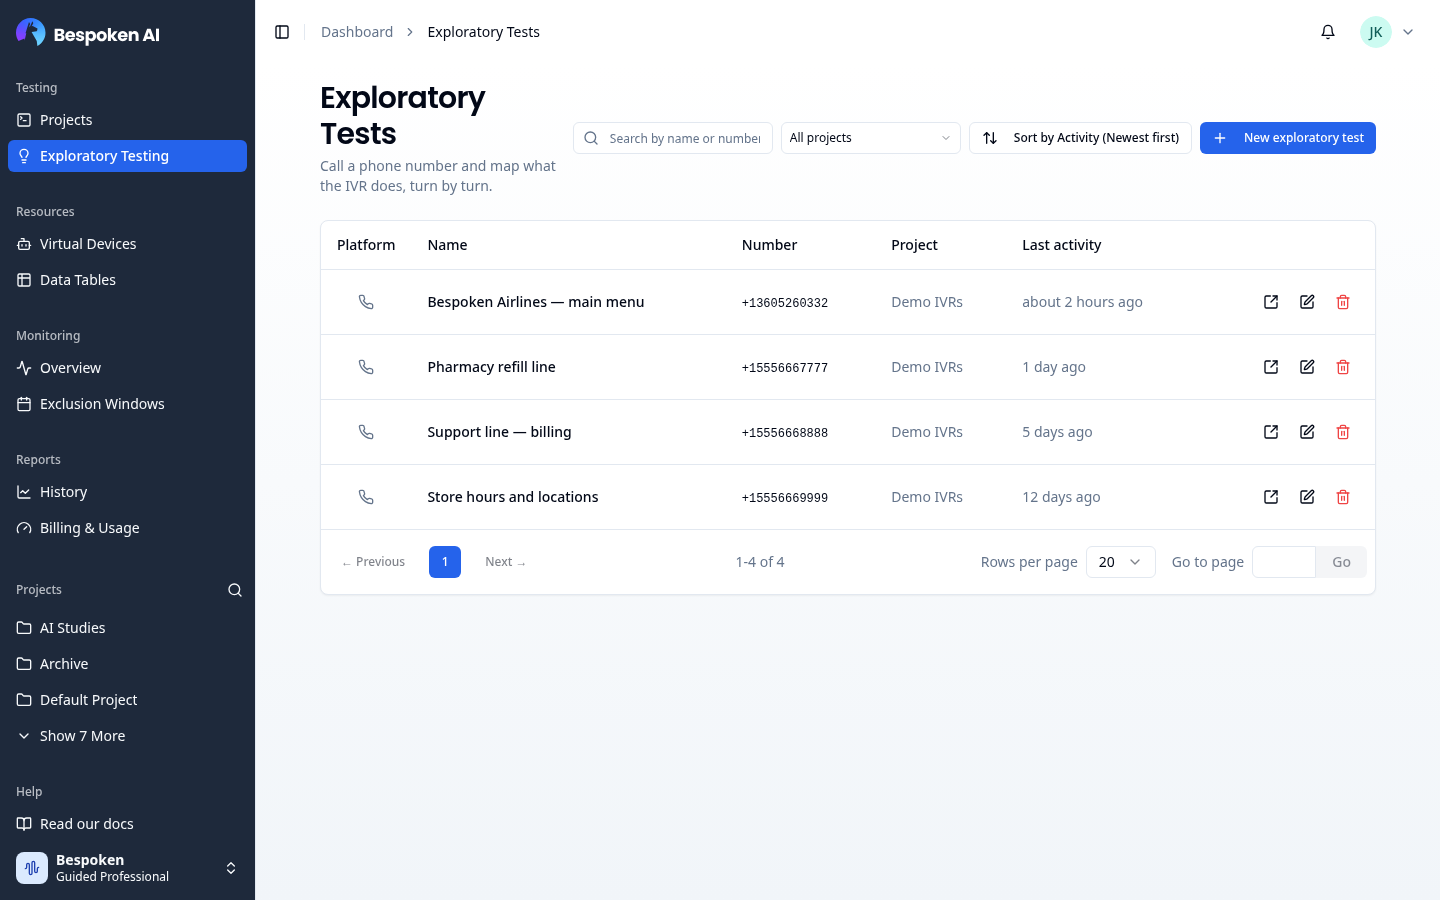
Each row shows the test's Platform, Name, Number, Project and Last activity. Click a row to open its workspace.
At the top of the page you can:
- Search by name or number
- Filter by project (defaults to All projects)
- Sort by name or by last activity (newest first by default)
Each row has these actions:
| Action | What it does |
|---|---|
| End call | Shown only while the test is on a call. Ends the call. |
| Open in new tab | Opens the workspace in a new browser tab. |
| Edit | Changes the name, phone number or project. Disabled while the test is on a call. |
| Delete | Removes the test and everything it mapped. This cannot be undone. |
# Creating an Exploratory Test
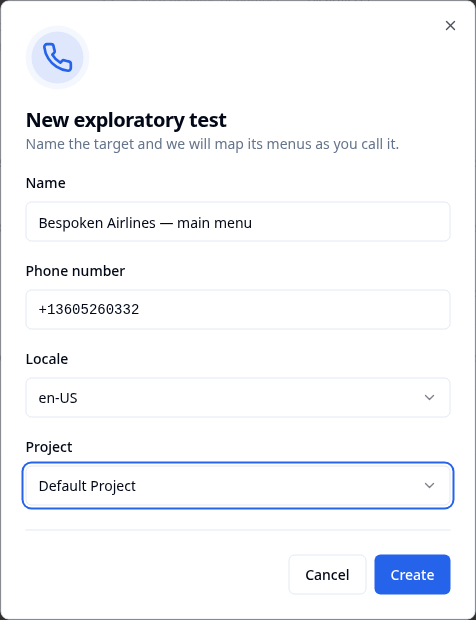
- Click New exploratory test in the top-right corner
- Enter a Name for the test, for example "Support line — main menu"
- Enter the Phone number to call, in E.164 format (e.g.,
+15556667777) - Choose the Locale of the IVR:
en-US(default),en-GB,es-ESores-MX - Choose the Project the test belongs to
- Click Create
All fields are required. Once created, you'll be taken straight to the test's workspace.
Changing the number
You can change the phone number later with Edit, but the steps already mapped stay on the graph. If the new number is a different IVR, delete those steps or create a new exploratory test instead.
# The Workspace
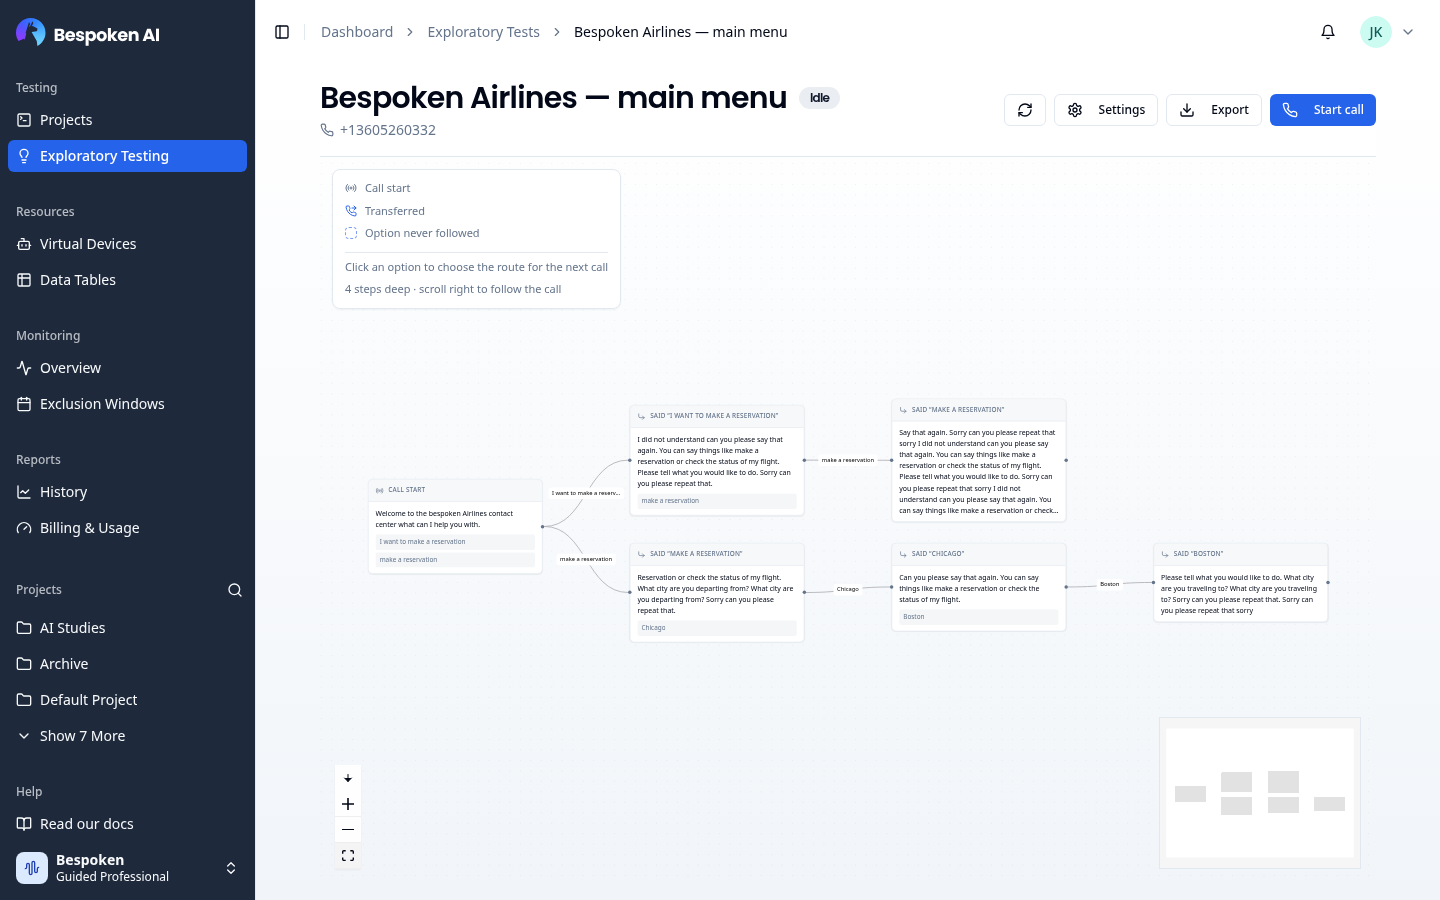
The workspace is where you place calls and explore the graph. It has a top bar, the graph in the middle and a side panel on the right: the call panel during a call, or the node inspector when you click a node.
# Top Bar
Next to the test name, a badge shows whether the test is On a call or Idle. Below it you'll see the phone number and how many options in the whole tree have never been followed (unexplored).
- Refresh reloads the graph. The graph updates by itself only while you're on a call from this page.
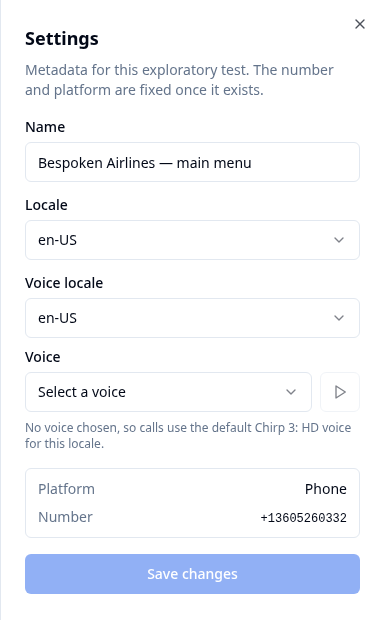
- Settings lets you change the name, the locale and the voice used on calls.
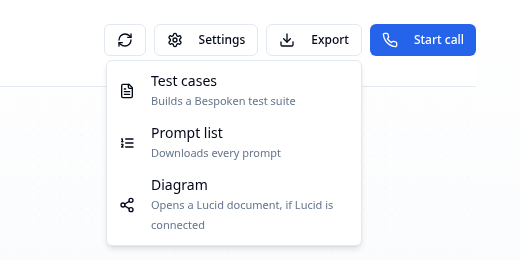
- Export offers three outputs:
- Test cases builds a new Bespoken test suite from the graph, named
<test name> [GENERATED]. A notification with an Open link takes you to it. - Prompt list downloads every prompt the IVR played.
- Diagram opens the graph as a Lucid document. This option needs Lucid to be connected for your account; contact Bespoken support if it isn't.
- Test cases builds a new Bespoken test suite from the graph, named
- Start call places the call (see Placing a Call).
# Choosing a Voice
Open Settings to pick the voice used when you speak to the IVR. Choose a Voice locale, then a Voice, and use the play button to hear a sample. Only voices that can be streamed on a live call are listed. If no voice is chosen, calls use the default voice for the test's locale.
Click Save changes to apply.
# Reading the Graph
Every prompt the IVR plays becomes a node. The graph starts at Call start and grows to the right (or downwards, if you switch to the vertical layout with the button next to the zoom controls).
Each node shows:
- How the call got there: "Call start", "Pressed 1", "Said "billing"" or "Continued"
- The prompt the IVR played
- Intents detected in the prompt, if any
- Options found in the prompt: the keys or phrases that lead somewhere else
Options you've already followed are grey. Options never followed have a dashed outline and are marked unexplored. A transfer icon marks nodes where the call was transferred out of the IVR.
Use the zoom controls and the minimap to move around large graphs.
# Choosing a Route for the Next Call
Click an option on any node to make the next call follow it. Every option on the way there is highlighted, and the legend shows how many steps the route has. Click the option again to clear it.
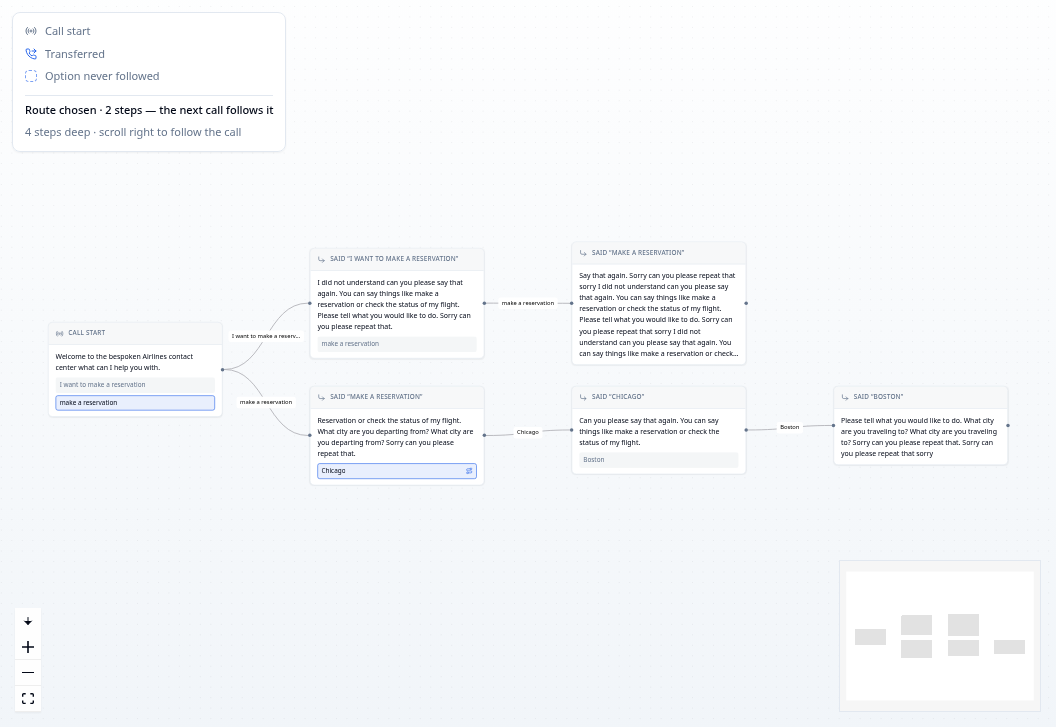
With no route chosen, the next call explores on its own.
# Placing a Call
Click Start call in the top bar. This places a real phone call to the test's number and records it.
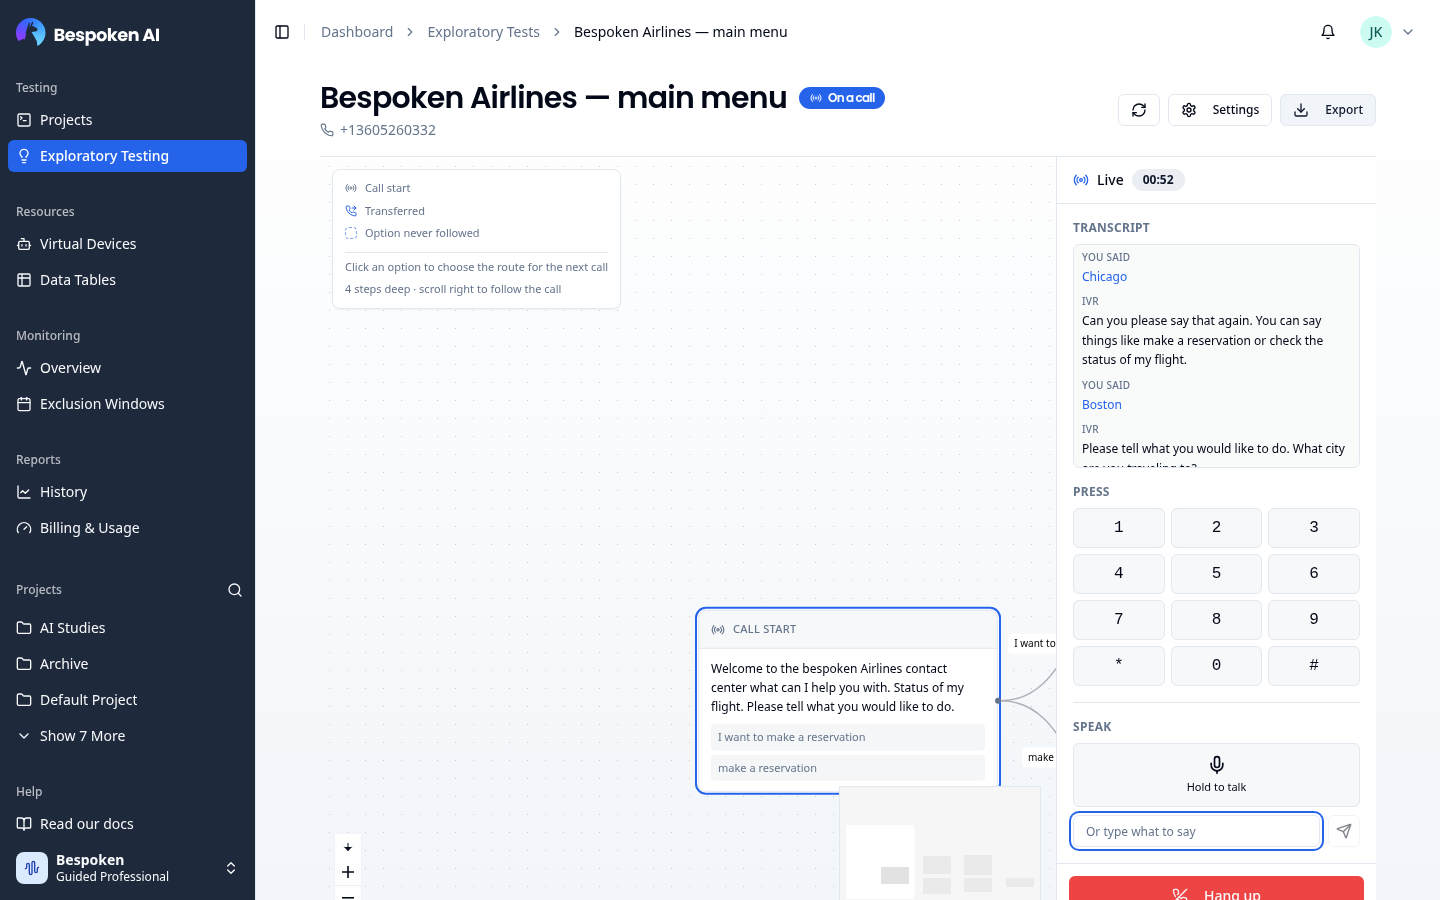
The call panel opens on the right with:
- Transcript: what the IVR said, and what you pressed or said
- Press: a dialpad (0–9,
*and#) - Speak: hold Hold to talk to speak through your microphone, or type a phrase in Or type what to say and send it.
The dialpad and speech stay disabled until the IVR plays its first prompt, so nothing you send is lost.
Click Hang up to end the call. When it ends, the graph refreshes with everything the call reached.
Call limits
A call hangs up after 10 seconds of silence and lasts 10 minutes at most. You can change the silence timeout per node (see Behaviour).
Utterance Usage
Exploratory calls consume utterances from your plan. You can follow this usage on the Billing & Usage page under Exploratory Testing.
# Editing a Node
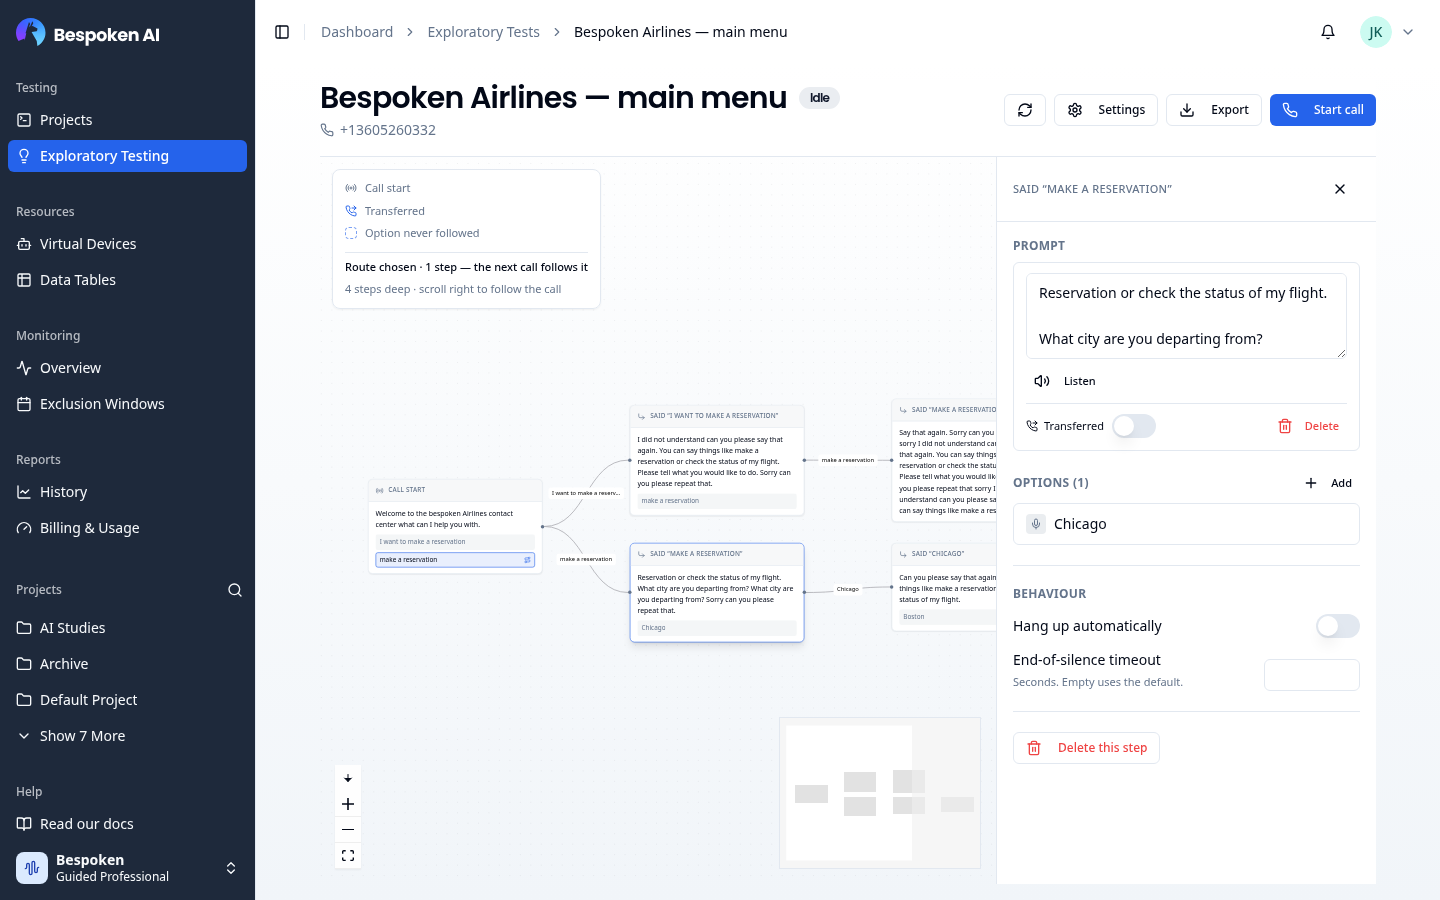
Click a node to open the node inspector.
# Prompt
Shows the latest transcription of the prompt and how many times it was heard. From here you can:
- Correct the transcription: edit the text and click Save correction
- Listen to the recording
- Mark the prompt as Transferred
- Delete the prompt. It disappears from the graph and from every export.
Prompts can only be edited once the call ends.
# Options
Lists the ways out of this node. Click Add to tell the crawl about an option it didn't detect:
- Spoken: a phrase to say, e.g. "billing"
- Keypad: a key to press (0–9,
*or#)
You can add an optional description. Click an option to edit it, or use the trash icon to delete it. Deleting an option that was already followed also removes what was found behind it.
# Behaviour
- Hang up automatically: turn it off to keep the call on the line at this node.
- End-of-silence timeout: how many seconds of silence to wait before moving on. Leave it empty to use the default.
Options and behaviour can be changed during a call. The call picks up the changes on its next turn.
# Deleting a Step
Click Delete this step to remove a node. Any steps after it stay and connect to the previous step. This cannot be undone and is only available once the call ends.
# From Exploration to Test Suite
When the graph covers the paths you care about, use Export → Test cases to generate a test suite. You can then open it on the Test page to review the tests, add assertions and run them, or monitor them on a schedule.